**This blog post was updated December 7, 2023.**
Whether your child inherited one of your pre-loved iPhones or has the latest release with all the new bells and whistles, it’s important that you help keep them safe while they’re texting, playing games, and surfing the web.
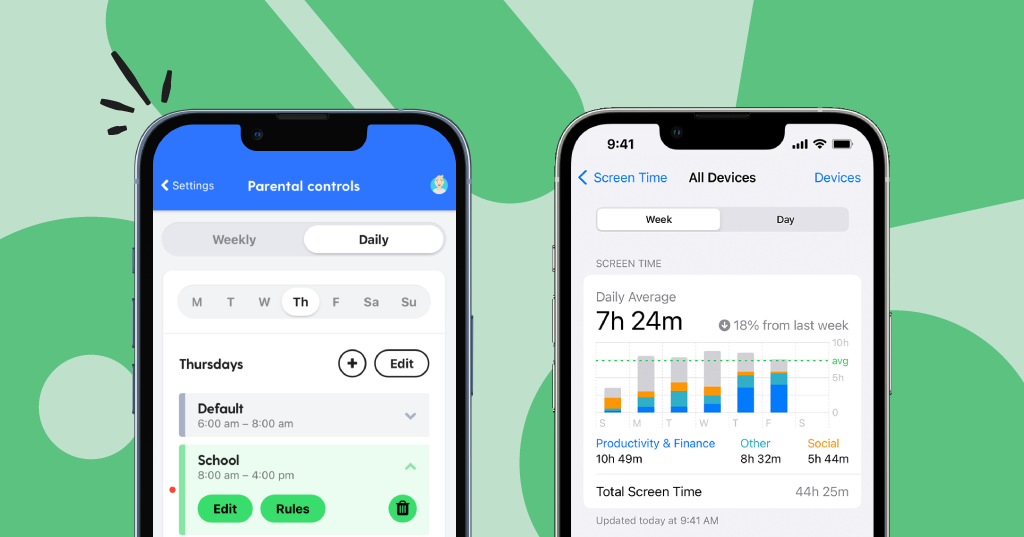
In this guide, we’ll explain how to put parental controls on iPhone devices like screen time limits, web filters, privacy settings, and more. Apple Screen Time and Bark are our two preferred options because Apple Screen Time comes built-in and is free, and Bark because we built it to be completely customizable for parents — and hey, it’s us!
How to Put Parental Controls on iPhone Devices Using Apple’s Built-in Features
To get the most out of Apple’s parental controls, we recommend updating to OS 15, which is supported on most iPhone models, including:
- iPhone 13, iPhone 13 Pro, iPhone SE (3rd gen)
- iPhone 12, iPhone 12 Pro
- iPhone 11, 11 Pro, 11 Pro Max
- iPhone XS and XS Max
- iPhone XR
- iPhone 8 and 8 Plus
- iPhone 7 and 7 Plus
- iPhone 6s and 6s Plus
- iPhone SE
Not sure which OS your child’s device is running? Navigate to Settings > General > Software Update to find out. If the phone is due for an upgrade, you’ll be prompted to download and install the latest software.
Family Sharing
In order to use Apple’s parental controls, you’ll need to have a child account set up. (If your child is already set up, feel free to skip this step). To do this, you’ll need to enable Family Sharing. Family Sharing allows you to share controls for purchases, storage, locations, calendars, and more with members of your family. Simply select features to share and send invitations. You’ll be able to add up to 6 children with Family Sharing, although you won’t be able to add children that are 18 years or older.
To begin, head to the Settings app on your device (iPhone or iPad). From there, tap the Apple ID button, and then tap Set Up Family Sharing > Get Started. From here, you can select apps and features to share across your family’s iCloud account. You’ll be able to customize settings for tons of features, including:
- iTunes and App Store purchases
- Apple Music
- iCloud Storage
- Location Sharing
- Screen Time
Enabling Screen Time
Apple Screen Time allows you to see how much time your children spend on apps, websites, and more. Additionally, you can set screen time limits, block or limit certain apps and features, restrict explicit content, and prevent purchases and downloads on your child’s device.
Setting Down Time and App Limits
Downtime allows you to decide how long your child can use their phone each day. Use the Start and End times to set a schedule regulating your child’s screen time, then tap Set Downtime.
App Limits allow you to set up time limits on the apps your child uses. Note that you’ll only be able to restrict apps based on pre-selected categories chosen by Apple, which are:
- All Apps & Categories
- Social Networking
- Games
- Entertainment
- Creativity
- Productivity
- Education
- Reading & Reference
- Health & Fitness
- Other
Putting Content and Privacy Restrictions in Place
This feature will allow you to prevent your child from viewing mature or explicit content in native Apple apps like iTunes or the App Store. You will also be able to set permissions to restrict them from changing the privacy settings on the iOS device.
Select Settings > Screen Time > Content & Privacy to begin. Options on this page include:
- iTunes and App Store Purchases: Restrict the ability to install/delete apps and make in-app purchases.
- Allowed Apps: Restrict the native Apple apps your child can use (Mail, Safari, FaceTime, etc).
- Content Restrictions: Restrict the content your child can access across the entire device. Generally speaking, this feature ensures that your child can’t access explicit content, such as movies or TV shows over a certain rating, explicit books or music, or explicit web content searched through Safari.
- Privacy: Restrict location services and apps that rely on user data and input.
How to Set Parental Controls with Bark
Bark is the perfect choice for blended tech families — that is, families in which a parent has an Android device and children have iPhones. Dedicated iOS families are also great candidates for Bark! We use kid-proof technology that allows parents to manage screen time and filter websites easily with little fuss. Setting healthy boundaries around tech use is crucial as kids grow up, and Bark provides unparalleled customization not only for each family but for each individual child.
Screen time features you won’t find anywhere else
Bark’s approach to screen time centers on the idea that different times of day call for different screen time rules — one size definitely doesn’t fit all. For example, when your kids are in school, you can block access to everything but educational sites. And at bedtime, you can allow apps to help them wind down for the evening. And because all kids deserve to blow off a little steam, you can designate free time hours just for play.
Check out our step-by-step guide to setting up screen time schedules with the Bark app.
Web filtering as unique as your family
Our world-class web filter lets you select exactly which websites your child can access on their devices. You can allow or block specific sites — or even whole categories like streaming services, online gaming, sexual content, and more. You can also decide exactly which apps (especially potentially dangerous ones like Snapchat or Omegle) your child can access and when.
Read more
Bark helps families manage and protect their children’s digital lives.


